Thursday, May 2, 2013

DIY YSL RING


Hey girlies!

I posted on IG earlier on how to get this super cute ring, and heres a quick video on it! Please don't mind my sick voice, or the fact that it isn't in HD. I had to record with my macbook, and I didn't even actually plan on posting it, I just did it for myself actually. But anyways, hope you guys try it out, and if you do tag me in it on IG! I really wanna see it :) xo


Tuesday, April 16, 2013

MAC & CHANEL HAUL!


Mark and I went to the mall tonight and he treated me to a few more lip products! If you know me, I am a sucker for tons of lip products so we stopped at Chanel (duh) and Mac :)

I ended up getting two lipsticks from MAC. Pink Nouveau (Satin) and ChatterBox (Amplified).


As for Chanel, I got a mirror and a lipstick. I know, I know some people may think why the hell do you wanna spend $40 bucks on a mirror when you can buy one from lets say the dollarstore, but I like nice things lol. I cannot help it. And I've been wanting a Chanel mirror forever. They are super cute, and classy looking and even came with a neat dustbag! The lipstick I got is from the Rouge Allure collection in 112 Fantasque! Gorg.


I also have a NYX haul that I need to share with you guys! Hope you're having a great week! xoxox

withlove, Chrissy

Thursday, April 11, 2013

Pintrest Love


I am totally inlove with Pintrest! Follow me: https://pinterest.com/withlovechrissy

Wednesday, March 27, 2013

March Faves!


1. EOS lip balm in Sweet Mint, so yummy! I swear they are worth the hype. They do wonders for my lips.

2. I honestly cannot even remember where I got these adorable sunnies from but I have been in loeve with them this month! 

3. NARS bronzer in Casino. I've had this for a little while but I totally forgot about how amazing it was. I too get a little while in the winter and I'm not really the complexion I want to be yet (won't be there till at least June LOL) so for now I've been warming up my skin with this baby! 

4. MAC blush in Blunt for contours! 

5. I promise you I swear by OPI's Nail Envy (original) it is the reason why my nails are so healthy and why they grow so fast. I recently cut all my nails fairly short and starting to grow them back, and this is what I'm using to help them get back to the length I really want them to be. I must warn you that it is a little pricey ($19.99) for a base coat, but it is AMAZING and worth every penny. I'd seriously pay $40 for it. 

6. Essie's Ballet Slippers. My favorite nail polish of all time is now perfect for spring!

7. YSL lipstick Rouge Couture in 06

8. MAC lipstick in Please Me (matte)

9. Miss Dior Cherie perfume

10. NYX Mega Shine in Sugar Pie 


What's your faves this month?! 

withlove, Chrissy 

Sunday, March 24, 2013

Customize your doc (mac users!)


I found this really awesome website that I thought I'd share with you. You can customize your very own icons for your mac! How cute, right?! I'm all for cute, girly and making things my own. I hated the blah boring icons that came with my computer so I decided to change them up to some of my faves!

If you wanna try this out too click here


withlove, Chrissy!

Saturday, March 23, 2013

Costco haul!


EOS lip balms are my fav! And only 4 for $9.99 is amazing considering they are almost 4 bucks each! I also had to pick up some Kimmie tabloids. If you know me, you know I LOVE me some Kardashies.

Hope you're having a good weekend!

withlove, Chrissy

Wednesday, March 20, 2013

Fake MAC

I always suggest if you want MAC cosmetics, go to a MAC store or counter. There are tons of fake MAC all over the internet. Especially on eBay. I obviously knew that when I purchased this lipstick it was too good to be true considering the lipstick was only $3.00 but I bought it purposely to see the differences between a real MAC lipstick, and a fake. Here are some of the things I noticed right off the bat.


The lipstick on the left is real deal. You can clearly see a difference in thickness of both lipsticks. The lipstick on the right is a lot fatter. Also the text on the actual lipstick packaging is written in white opposed to being written in silver. It's hard to pick up on camera, but the texture is also very, very different.


(Right is real, left is fake) These are supposed to be the same colour. It's clear they are NOT. Once I took off the lid, I was quite surprised that both the insides look the same, but still minor details proved that it was indeed fake.


All in all my advice to you is not to buy MAC on eBay or any other site other than MAC. You won't find MAC cheap anywhere online that is authentic, and if you do it's either been used or it's just not real.

withlove, Chrissy

Sunday, March 17, 2013

Peigh's christening †

Today was our little princess Peigh's christening. I'm so happy to know that our beautiful little girl has been blessed and offered up back to the Lord. She has been a blessing to me, Mark and all our amazing friends and family.

We just want to thank everyone who made it out today to share another special moment with us. We truly love you all.

Okay, picture spamming time!


withlove, Chrissy xo

Monday, March 11, 2013

2013 Spring nails!

Spring is only nine days away, and Easter is in March this year! How crazy right?! The year seems to be flying on by, but when I think of spring I automatically think of easter and what better way to start getting ready for both with cute spring nails! I've selected six of my favourite nail colours from my collection that I believe are perfect for spring time.


Sunday, March 10, 2013

Lakeshore OOTD

Outfit of the day today at Lakeshore with Mark & my sister Carol! 


Hat: Polo by Ralph Lauren 
Jacket: H&M 
Sweater: Joe Fresh 
Boots: Vintage 
Tights: Garage 
Watch: Michael Kors 
Cluth: Michael Kors 

DIY: Top knuckle ring


Hey loves!
I'm going to show you guys a quick, and simple way to make your own top knuckle rings! They're so popular now, and sometimes they're even way over priced. I'm going to show you how to make at least 10, for only $1.

You'll need:
Image
Wire: I purchased mine at the dollarstore. You can also get some at your local craft store. This wire is pretty much bendable to the point where I won't need pliers. If you do get a thicker type you may need a pair.
Image
Scissors: To cut your wire to your desired length.
LET'S GET STARTED ON OUR FIRST DESIGN!!
Image
Step 1: Cut a piece of wire about the size of your wrist. The type of ring we are going to create is a wrap around, and we need quite a bit of wire. Once you have that piece cut, begin by taking one end of the wire and wrapping it around your finger.
Image
Step 2: Keep wrapping!
Image
Step 3: When you are completely done wrapping your ring should now look like this.
Image
Step 4: Tuck those sharp edges in by wrapping them around the top of the ring.
Image
TADA! Ring one is done. You can tighten it now to make the space between the wire closer together.
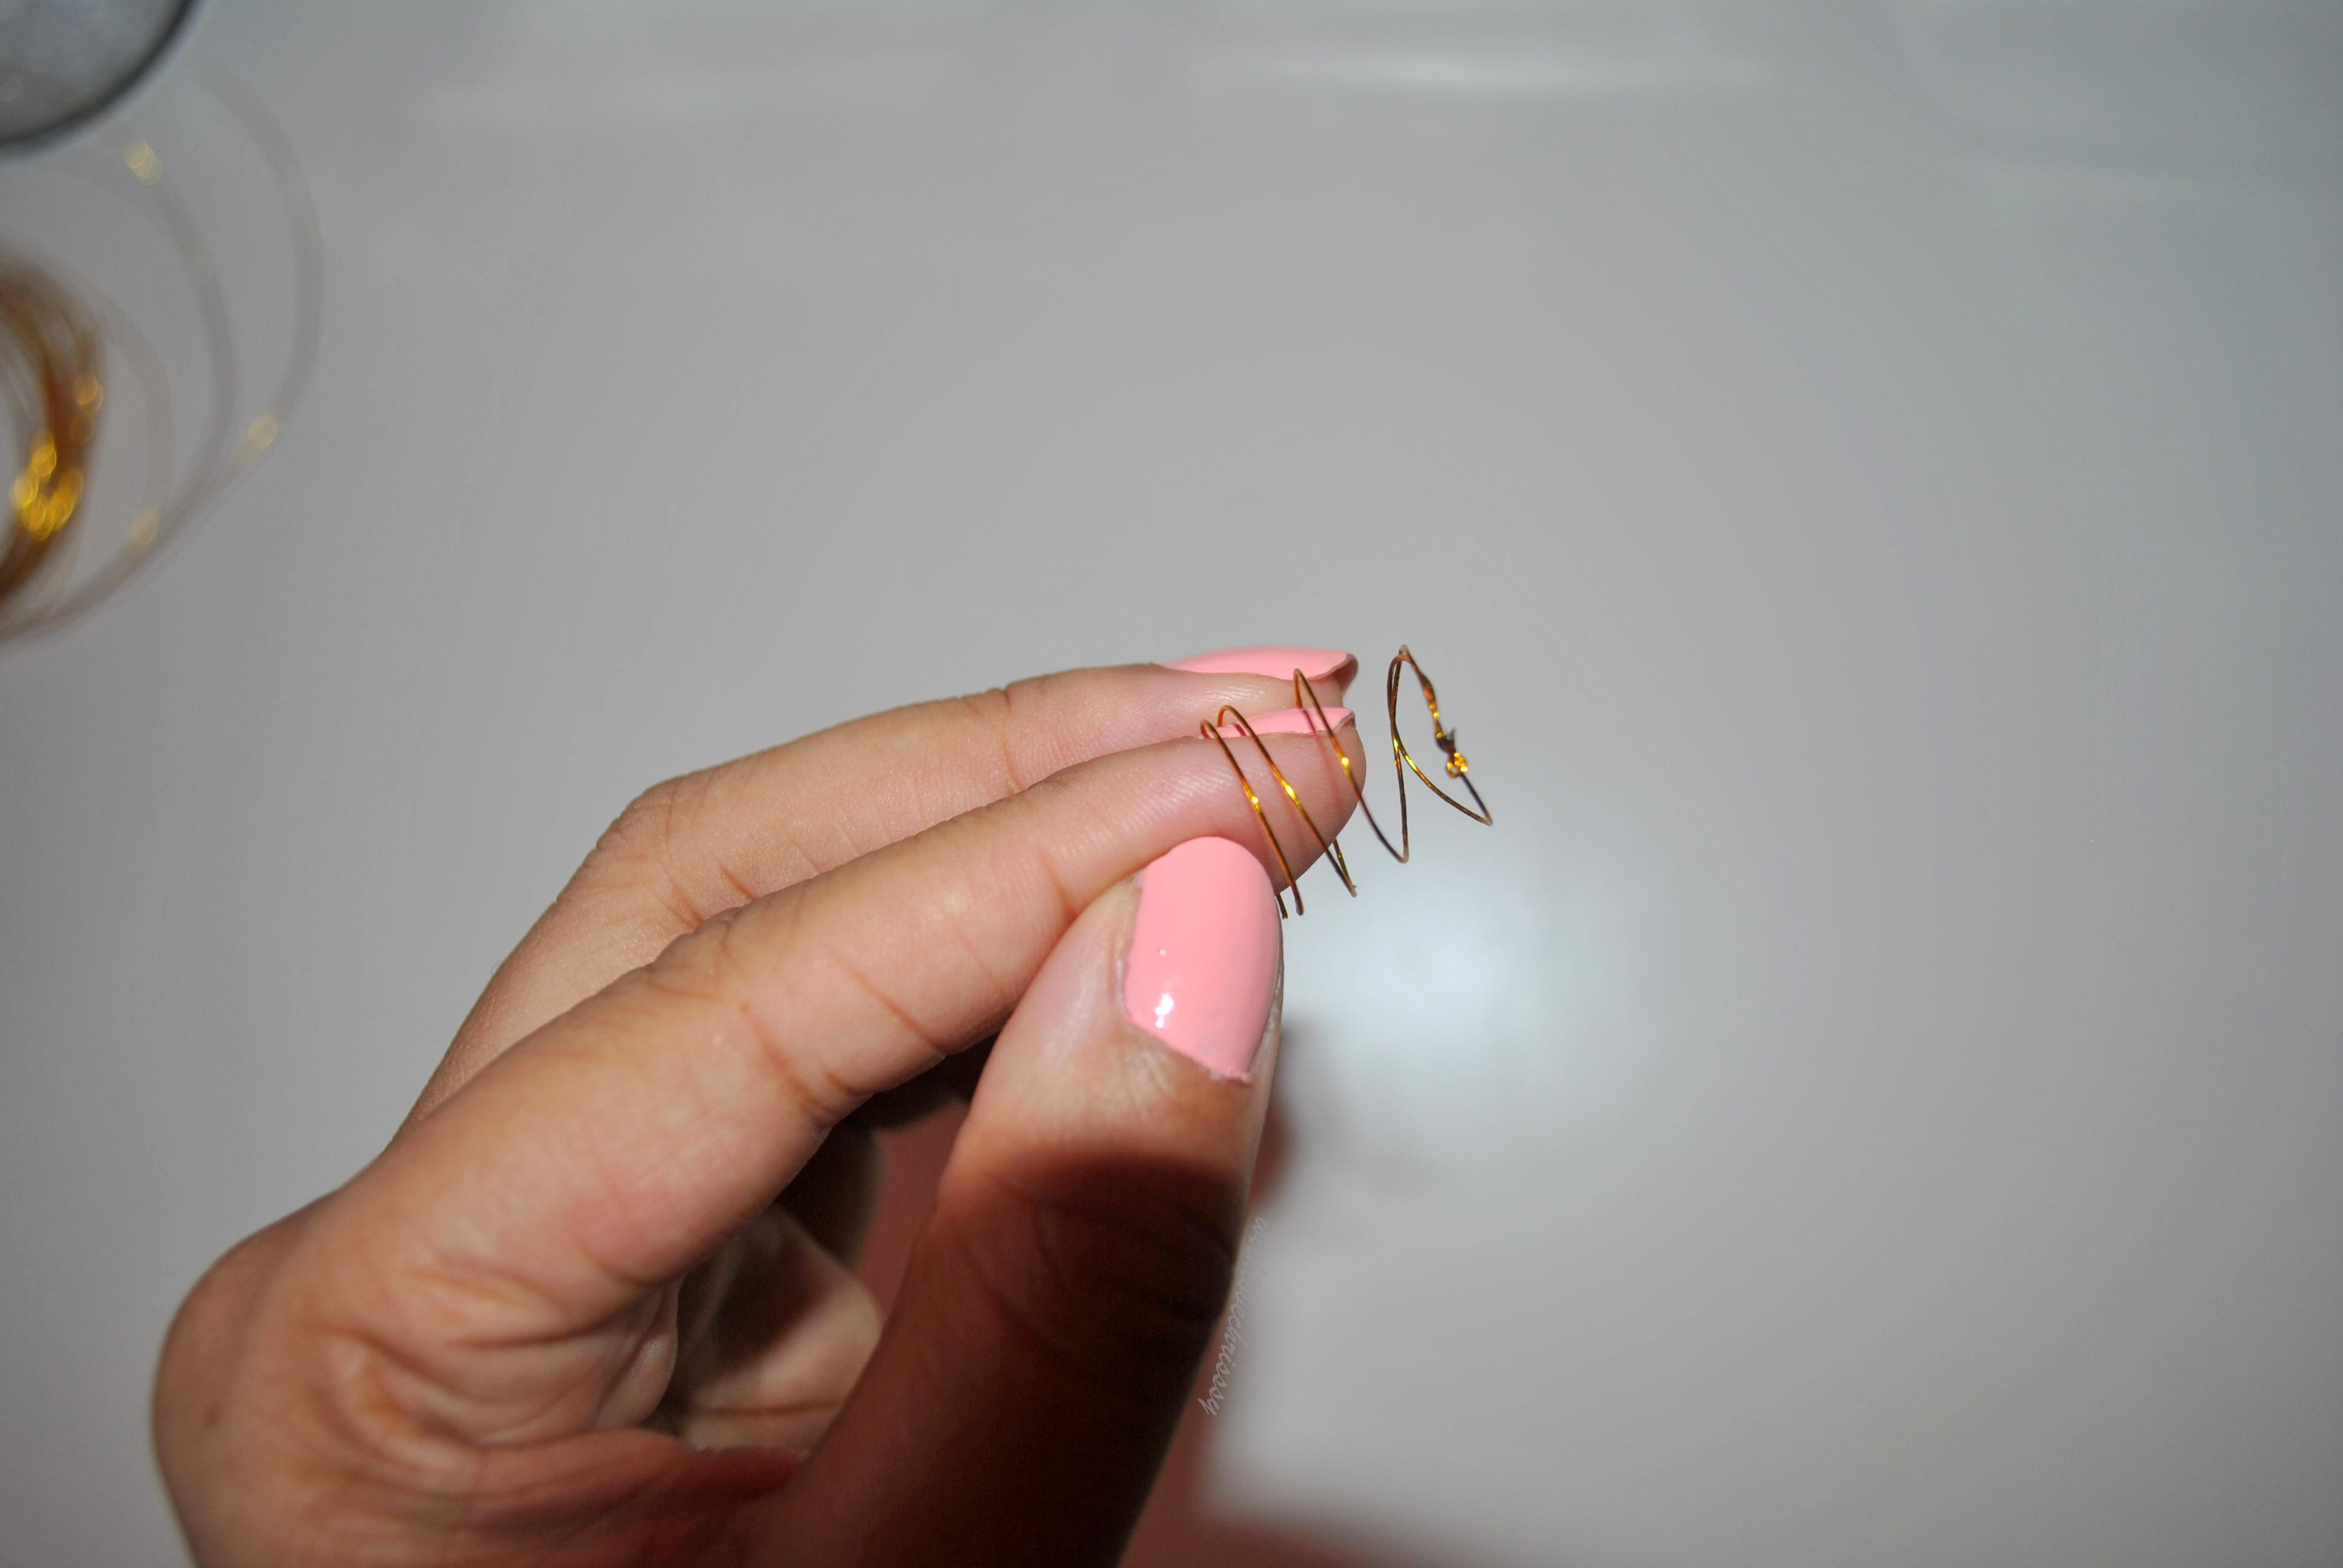
----
RING TWO
Image
Step 1: You're going to cut a piece of wire, a little bit smaller this time. You're then going to make a little loop at the end of the wire.
Image
Step 2: String the straight end into the end with the loop.
Image
Step 3: Put your finger through the ring hole and pull the straight end to make it tight and the desired fit.
Image
Step 4: Remove your finger and take that straight piece that is sticking out and begin to loop it through the ring and tighten it each time at the top of the ring.
Image
DSC_0417.NEF
TADA! I clearly like the more messy knot look, but its totally up to you.
withlove, Chrissy xo